Lab 4: Mazes - Depth First Search
Overview
In this lab, we will implement a generic version of the Stack
data type within the context of creating a maze.
Materials
Setup
- Download the skeleton for this project.
- Extract the code, then open the maze151dfs folder in IntelliJ to start a new project.
Description
In this lab, we will explore creating a maze using a stack to
organize our potential Positions. The stack allows us to create in a
depth-first search manner. In other words, we can carve out a trail
as far as possible, and backtrack if we reached a dead end in our
journey, because we search the youngest potential position next.
In this lab, you will create the necessary data structures to create a
maze in this depth-first search manner.
To start, run the code in MazeApp. You
should see the GUI layout here.
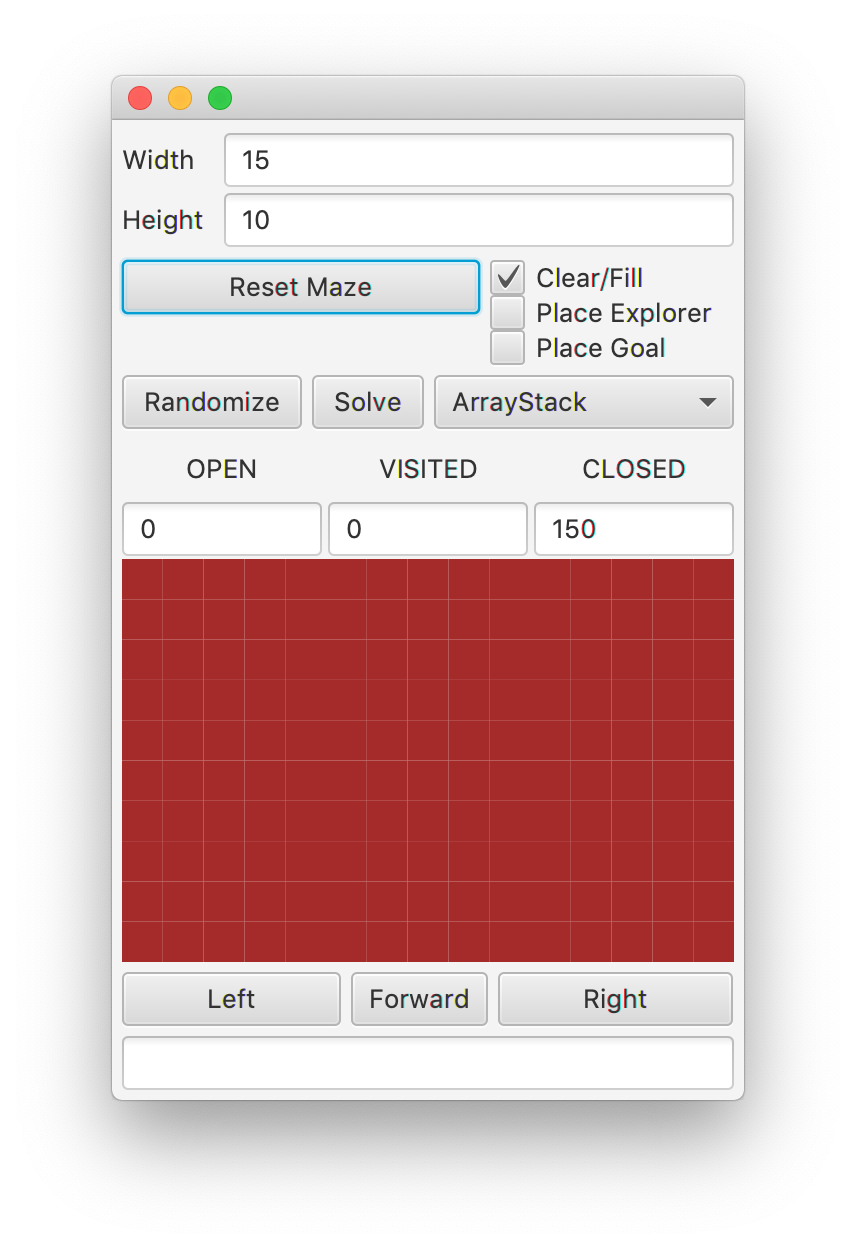
There are a few new pieces to this GUI. First, you will see a
choice for either ArrayStack or ListStack.
You will find the starter code for these included in the
maze.searchers directory.
Second, you will notice that there are statistics in the middle portion
of the GUI, recording the number of OPEN, CLOSED, and VISITED squares.
Third, there is a box at the bottom, to report errors when
things go wrong with the underlying implementations. It will also report
the number of steps taken when a solution trail is found through
searching.
Note: This project contains a working implementation of the Maze
Enum and Array Lab, so you do not have to revise any of your earlier code to add
this functionality.
Step 1 - ArrayStack<E>
Our first task is to implement a generic Stack class that can be used in many
pieces of the code, for generating and then solving mazes.
Write a class called ArrayStack<E>. This will need to implement the
Stack<E> interface. The fields and constructor are provided for you.
Important: All of your
implementations for this lab will be located in the maze.searchers
directory.
Step 1.1 - public void push(E item)
If there is no more room in the stuff array, you will need to resize.
- Create a new array twice as big as
stuff.
- Copy over each item into the new array.
- Redirect the
stuff reference to the new array.
Now, you can always add the new item to top spot in the stuff array,
and increment the top.
Step 1.2 - public E pop()
Call the emptyCheck method. This will throw an IllegalStateException
if the stack is empty.
Decrement the value of top, and then return the item in the top spot
of the stuff array.
Step 1.3 - public E peek()
Call the emptyCheck method. This will throw an IllegalStateException
if the stack is empty.
Return the item in the top - 1 spot of the stuff array.
Step 1.4 - public int size()
Return the number of items in stuff.
Step 1.5 - public String toString()
Return a String representing the elements in the stack separated
by spaces. For example, a stack of integers with 3 on top of 2 on top of 1
should return “1 2 3”. The oldest element in the stack should be the first
in the string.
Step 1.6 - Testing
Run the ArrayStackTest suite, and ensure your above methods are passing
these tests.
Step 2 - ListStack<E>
Next we will implement the generic version of a Stack with nodes, called
ListStack<E>. This will need to implement the Stack<E> interface, and have
at least a ListNode<E> called top as a field.,
Step 2.1 - ListNode
Look over the file called ListNode.java. This class
implements the Node class we discussed. It should have an E value and
a ListNode next reference as private components, along with public get and set
methods for the value and next fields. There are two constructors.
The first brings in and stores only an E value, and leaves the ListNode next as null.
The second brings in both an E value, and a ListNode next, storing both.
Note: While the name of the file is ListNode.java, the name of the class when used
will be ListNode<E>.
Step 2.2 - public void push(E data)
Study the code provided. It will create a new ListNode that stores the data,
has the current topas its next, and finally redirects top to
reference this new ListNode.
Step 2.3 - public E pop()
Call the emptyCheck method. This will throw an IllegalStateException
if the stack is empty.
Save the value stored in top, and redirect top to point to the next ListNode.
Return the value you stored.
Step 2.4 - public E peek()
Call the emptyCheck method. This will throw an IllegalStateException
if the stack is empty.
Return the value stored in the top ListNode.
Step 2.5 - public int size()
If top is null, return 0. Otherwise,
return the number of ListNode that are chained from the top node.
Step 2.6 - public String toString()
Return a String representing the elements in the stack separated
by spaces. For example, a stack of integers with 3 on top of 2 on top of 1
should return “1 2 3”. The oldest element in the stack should be the first
in the string.
Step 2.7 - Testing
Run the ListStackTest suite, and ensure your above methods are passing
these tests.
Step 3 - Creating Random Mazes
We will explore two different algorithms for creating random mazes, by implementing the
tunnelRandomly function in the Puzzle class, defined as
public void tunnelRandomly(boolean perfect)
Step 3.1 - Perfect Mazes
A perfect maze is one without any loops or closed circuts. We can achieve this with the following algorithm by preventing the opening of nodes with more than one neighbor, using the numOpenNeighbors(Position p) method in the Maze.
Create an ArrayStack of Positions, and push new Position(0,0) onto the stack.
While the stack still has Positions:
- Pop the top
Position from the stack.
- If this
Position is in the maze, is filled, and has no more than one open neighbor,
- Clear this
Position
- Add the neighbors to the stack in a random order.
Tip: You should
use the randomDirections method of
Direction in the code above.
Step 3.2 - Braided Mazes
A braided maze is one without any dead ends. With a slightly different algorithm for opening cells, we can create these mazes. Use the boolean perfect parameter to allow for both algorithms to be run
in this one tunnelRandomly method.
Create an ArrayStack of Positions, and push new Position(0,0) onto the stack.
While the stack still has Positions:
- Pop the top
Position from the stack.
- Try to
clear this Position.
- If the clear was successful (returned
true):
- Add the
CLOSED neighbors of this Position to the stack in a random order.
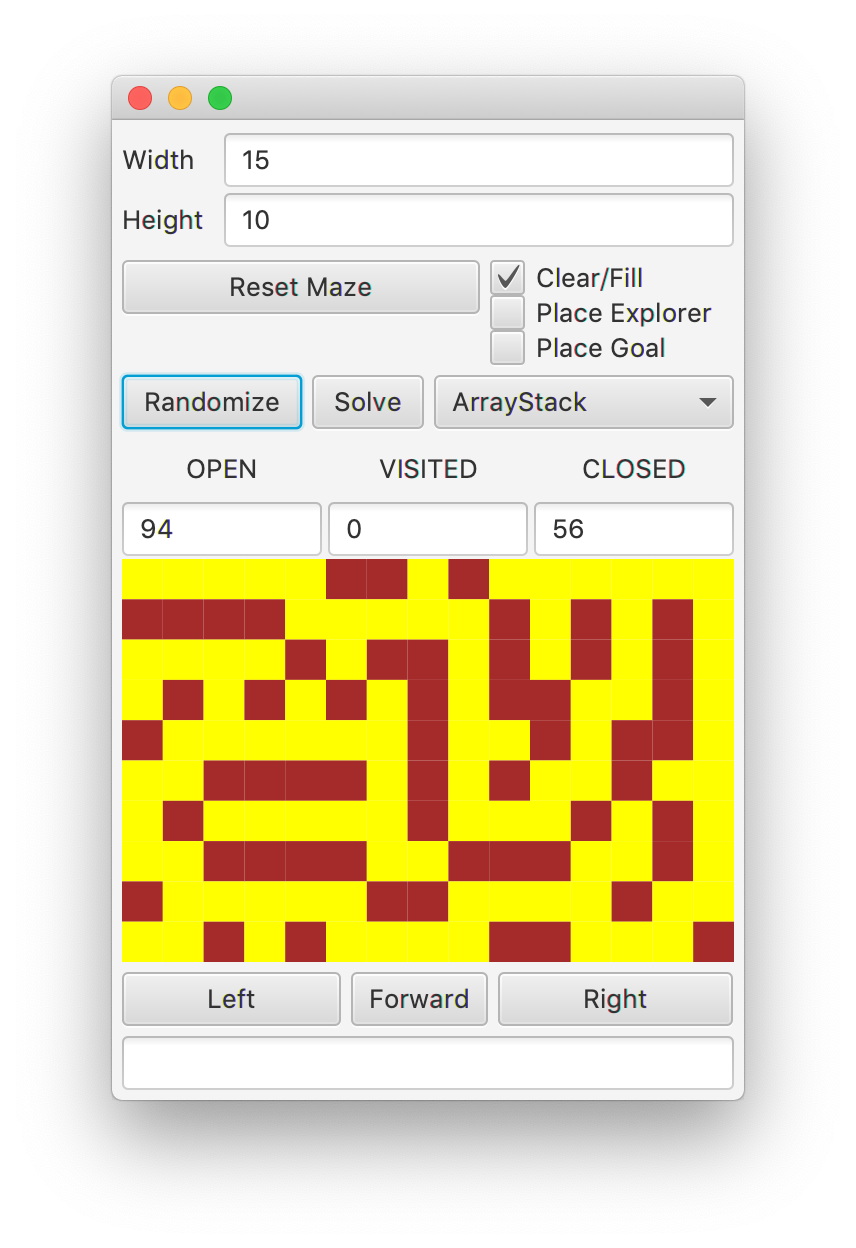
Step 3.3 - GUI
Run the GUI to interact with your code and make random mazes. You should
see mazes similar to the image below when making Perfect mazes.
Grading
- To Complete this lab, complete all the steps.