Lab 5: JavaFX and GUIs
Overview
In this lab, we learn how to create GUI components for applications
using JavaFX.
Materials
Description
To create an application using JavaFX, we will need a number of pieces.
There will often be a Model, View, Controller, and Application. Through these
three applications, you will see why all these are separated and how it is all connected.
Step 1 - Tip Application
For our first application we will create a tip calculator. We will include all of the details with multiple places where you copy and paste to create your application.
Step 1.1 - Setup
- Create a new Java project named “tip”.
- Create a new package within the project also called “tip”.
- Create a new class called
TipApp. This will hold the overview code
for the Application. Then enter the following code:
package tip;

import javafx.application.Application;
import javafx.stage.Stage;
import javafx.fxml.FXMLLoader;
import javafx.scene.Scene;
import javafx.scene.layout.BorderPane;

public class TipApp extends Application {
  @Override
  public void start(Stage primaryStage) {
    try {
      FXMLLoader loader = new FXMLLoader();
      BorderPane root =
        (BorderPane)loader.load(getClass().getResource("TipGUI.fxml").openStream());
      primaryStage.setScene(new Scene(root));
      primaryStage.show();
      root.requestFocus();
    } catch (Exception e) {
      e.printStackTrace();
      System.exit(1);
    }
  }
  public static void main(String[] args) {
    launch(args);
  }
}
Step 1.2 - Tip FXML View
Now, we need to add in the View, describing how the GUI will look on the
screen and the components available to the program.
- Select File → New → New FXML File
- For “Name” enter
TipGUI
- Then click “Finish”.
Editing the raw XML document can be extremely tedious. Luckily, there is
a extension called SceneBuilder that you can use to graphically add
components.
- Right-click on the
TipGUI.fxml file, and select “Open in SceneBuilder”.
- If “Open in SceneBuilder” is not present, select “Open in Associated
Application” and navigate to where SceneBuilder is installed on your machine.
- In the left-hand column under Document → Hierarchy, right-click and delete the
default
AnchorPane layout.
- Go to Containers and drag a
BorderPane into the center.
- Select the
BorderPane and pick the Layout menu in the right-hand column.
- Change Pref Width and Pref Height to USE_COMPUTED_SIZE.
- Drag a
VBox from Containers into “insert CENTER”.
- Select the
VBox and pick the Layout menu.
- Change Pref Width and Pref Height to USE_COMPUTED_SIZE.
- Drag an
HBox into the VBox.
- Go to Controls and drag a
Label and a TextField into the HBox.
- Select the
HBox and pick the Layout menu.
- Change Pref Width and Pref Height to USE_COMPUTED_SIZE.
- Select the
Label and pick Properties. Then change the text to
“Bill”.
- Add another
HBox to the VBox.
- Add a
Label and a ChoiceBox.
- Fix the layout as described above.
- Then change the
Label to “Service”.
- Add another
HBox to the VBox.
- Add a
Label and a TextField.
- Fix the layout as described above.
- Then change the
Label to “Total”.
- Select the
TextField and pick Properties.
- Uncheck the Editable box.
Your GUI should look like this
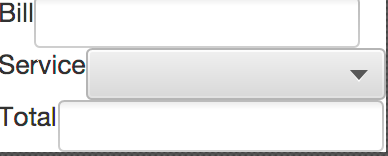
Now, save the GUI and close SceneBuilder.
Step 1.3 - Service Enum
We would like to tip based on three perceived levels of service. This is
an excellent opportunity for an Enum. Create a new Enum called
Service within the tip package. Add the following code:
package tip;

public enum Service {
  POOR {
    @Override
    public double tip() {
      return 0.1;
    }
  }, GOOD {
    @Override
    public double tip() {
      return 0.15;
    }
  }, EXCELLENT {
    @Override
    public double tip() {
      return 0.2;
    }
  };

  abstract public double tip();

  public double computeTotal(double bill) {
    return (1.0 + tip()) * bill;
  }
}
Step 1.4 - TipController
Now create a new class called TipController. This gives us a way to
respond to the clicks and keys pressed when the program is running.
The initialize method in a Controller is similar to a constructor in other classes. It will be the place where objects are created and initial state is set up.
Also notice the calculate method, which will compute the tip amount based on
the selected options in the app.
Add the following code:
package tip;

import javafx.fxml.FXML;
import javafx.scene.control.ChoiceBox;
import javafx.scene.control.TextField;

public class TipController {

  @FXML
  private TextField bill;

  @FXML
  private ChoiceBox<Service> tips;

  @FXML
  private TextField total;

  @FXML
  public void initialize() {
    bill.setEditable(true);
    total.setEditable(false);
    for (Service s: Service.values()) {
      tips.getItems().add(s);
    }
    tips.getSelectionModel().select(Service.GOOD);
  }

  @FXML
  public void calculate() {
    double billEntered = Double.parseDouble(bill.getText());
    Service level = tips.getSelectionModel().getSelectedItem();
    double totalAmount = level.computeTotal(billEntered);
    total.setText(String.format("%7.2f", totalAmount));
  }
}
Step 1.5 - Tip Calculation
Finally, we need a button we can click that will calculate the tip
according to our choices. In this step we are setting up the wiring
between the View and Controller portions of the app. Open up TipGUI.fxml
again in SceneBuilder.
- Add a
Button to the VBox between the second and third HBox elements.
- Change the text to “Calculate Total”.
On the left side, go to Document → Controller. Select
tip.TipController in the drop-down menu.
- Select the top
TextField.
- Go to the Code menu on the right.
- For fx:id, select “bill”.
- Select the other
TextField. For its fx:id, select “total”.
- Select the
ChoiceBox. For its fx:id, select “tips”.
- Select the
Button. For “On Action”, select “calculate”.
Save the GUI in SceneBuilder and close SceneBuilder.
Your GUI should look like this
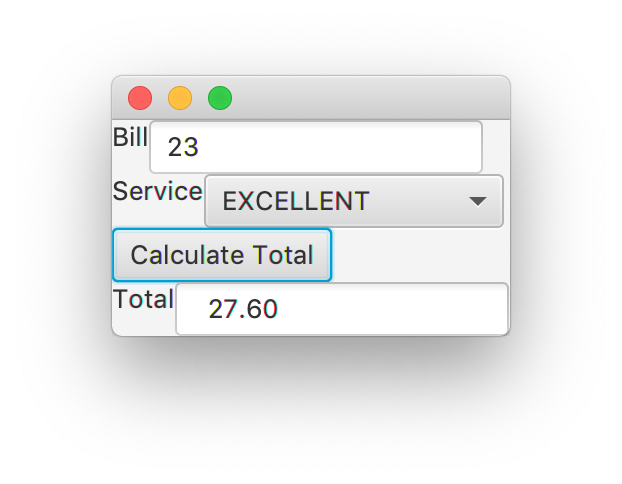
Run Tip and test the program.
Step 1.6 - Tip Extensions
Now, edit the program and interface as follows:
- Add a GREAT category to
Service, tipped at 18%.
- Add a way for the user to enter the number of people dining. Then, add a field to display the amount of money each individual separately owes.
- Read about spacing and padding and use them in SceneBuilder to improve the appearance of your GUI.
Now, start from scratch and use the information above to test out your
new JavaFX skills. Create a new project using JavaFX to make a program that records how many times a button has been clicked.
Step 2.1 - Application
Create a new Java project and package for your application. Copy/paste the template Application code above and alter it for your new project in a class called ClickerApp.
Step 2.2 - GUI View
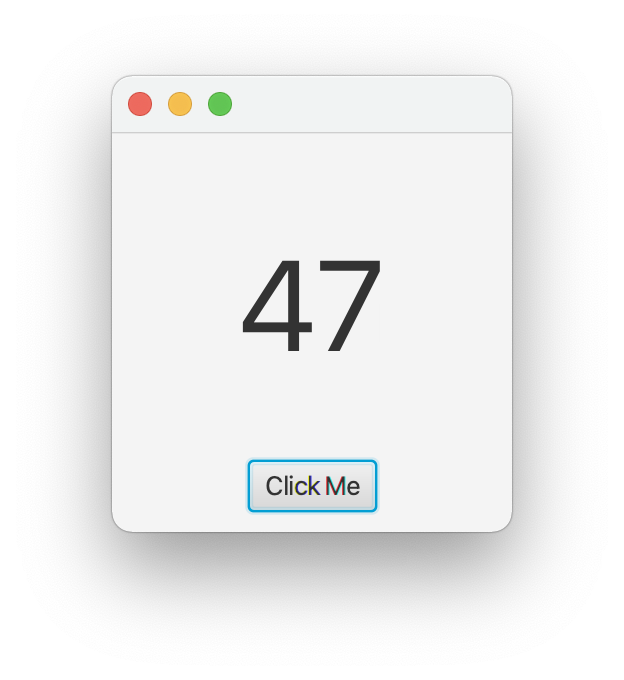
Create a FXML document. In your GUI, your project should include at a minimum a BorderPane with a Button and a Label, created through SceneBuilder. You might need some HBox or VBox pieces to organize your GUI.
Note: Be sure to add spacing and padding to have a visually uncluttered and pleasing GUI layout.
You GUI could look like this for example:
Step 2.3 - Controller
Create a Controller class. The controller should
- link up your GUI objects through fields.
- include an additional
int field to track the number of times the button has been pressed. This value should not be parsed and updated purely by using the GUI Label.
- attach a method to the
Button which increments the counter field, and then writes this number to the label on the screen.
Step 2.4 - Testing
Run the GUI and test your program.
Step 3 - TootsiePop
The previous two apps introduced the Controller, View, and Application, but noticeably there was no Model. For this third project, we will build an application around our TootsiePop class from earlier in the semester.
Step 3.1 - Application
Create a new Java project and package for your application. Copy/paste the template Application code above and alter it for your new project in a class called TootsiePopApp.
Step 3.2 - GUI View
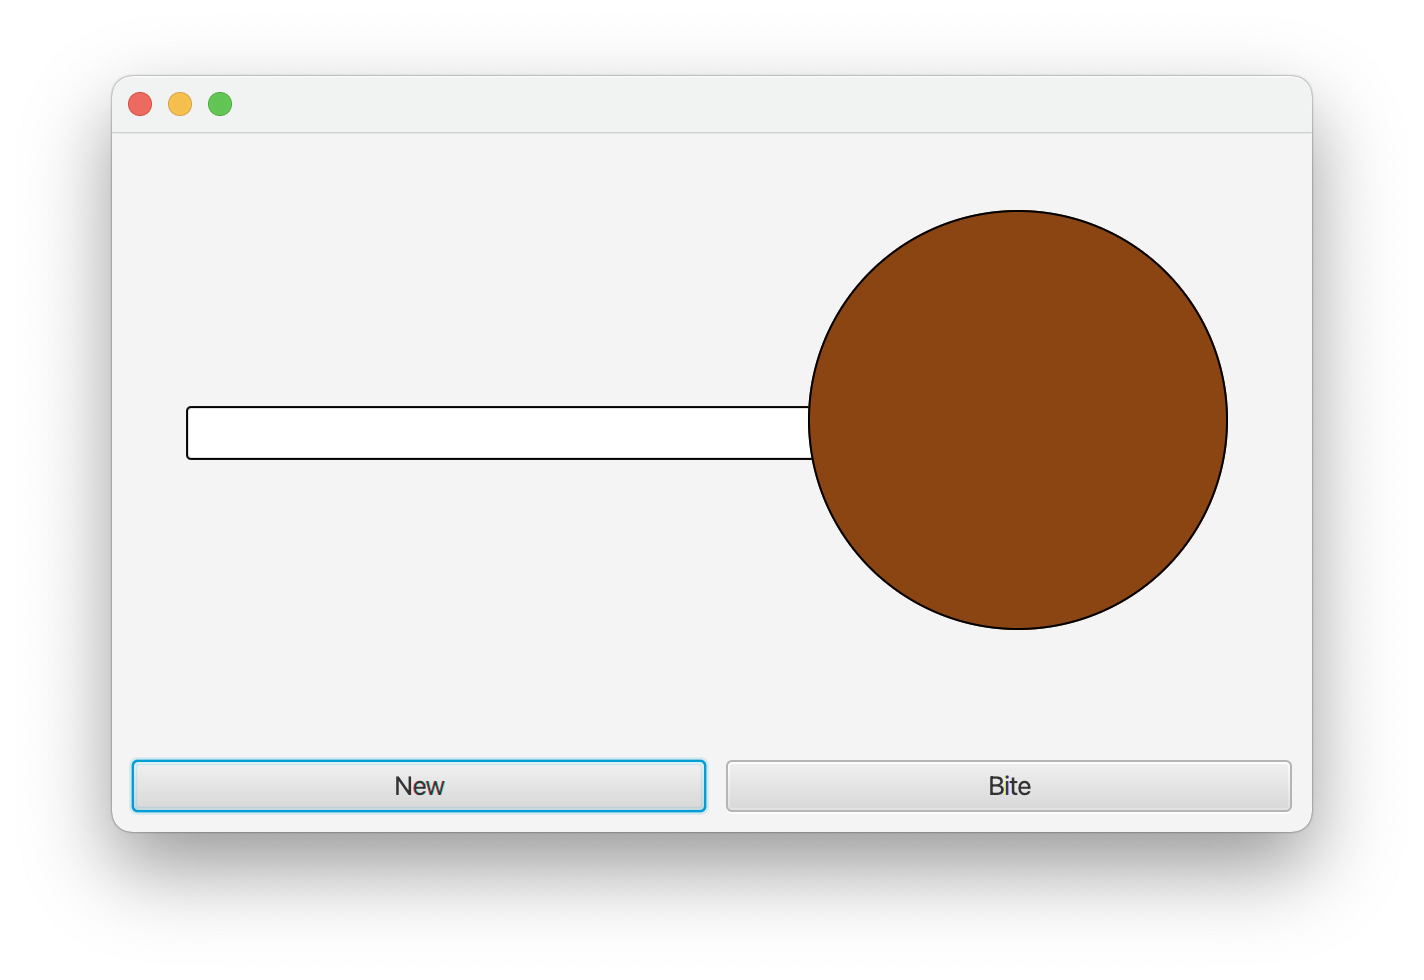
Create a FXML document. In your GUI, use SceneBuilder to include at a minimum a BorderPane with two Buttons and a visual representation of a TootsiePop created with a
Circle and a
Rectangle. You might need some HBox or VBox pieces to organize your GUI, and an AnchorPane could be helpful for designing the TootsiePop visuals.
The two Buttons should be labeled New and Bite.
Note: Be sure to add spacing and padding to have a visually uncluttered and pleasing GUI layout.
You GUI could look like this for example:
Step 3.3 - Flavor Enum
Create a Flavor Enum. You should define at least five flavors, each of which has a different Color accessible through a getColor() method.
Step 3.4 - TootsiePop Model
Revise your TootsiePop code from HW1 in the following ways to prepare it for use in the GUI application.
- the constructor should bring in a
Flavor instead of a String.
- add a
getLicks method to return the number of licks.
- add a
getFlavor method to return the Flavor of the TootsiePop.
The remaining methods should stay the same.
Step 3.5 - Controller
Create a Controller class. The controller should
- link up your GUI objects through fields.
- include a field for a
TootsiePop and create a new TootsiePop in the initialize method with a random flavor and a size of 40.
- attach an
onTap() method to the Circle which call lick on your TootsiePop.
- attach an
onNew() method to one Button which create a new TootsiePop with a random flavor and a size of 40.
- attach an
onBite() method to one Button which call bite on your TootsiePop.
- write an
updateView() method. In this method, the radius of the Circle should be set to be proportional to the number of licks left in your TootsiePop, and the Circle should use setFill to update its Color. You should call this method as the last command in each of the three previous interaction methods.
Step 3.5 - Testing
Run the GUI and test your program.
Grading
- To Complete this lab, do all of the steps