Lab 10: Graphics and Animation
Materials
Overview
For today’s lab, you’ll need PyGame. To download and install it on your
computer:
- Create a new PyCharm project.
- Create a new Python file (e.g.
main.py) within that project.
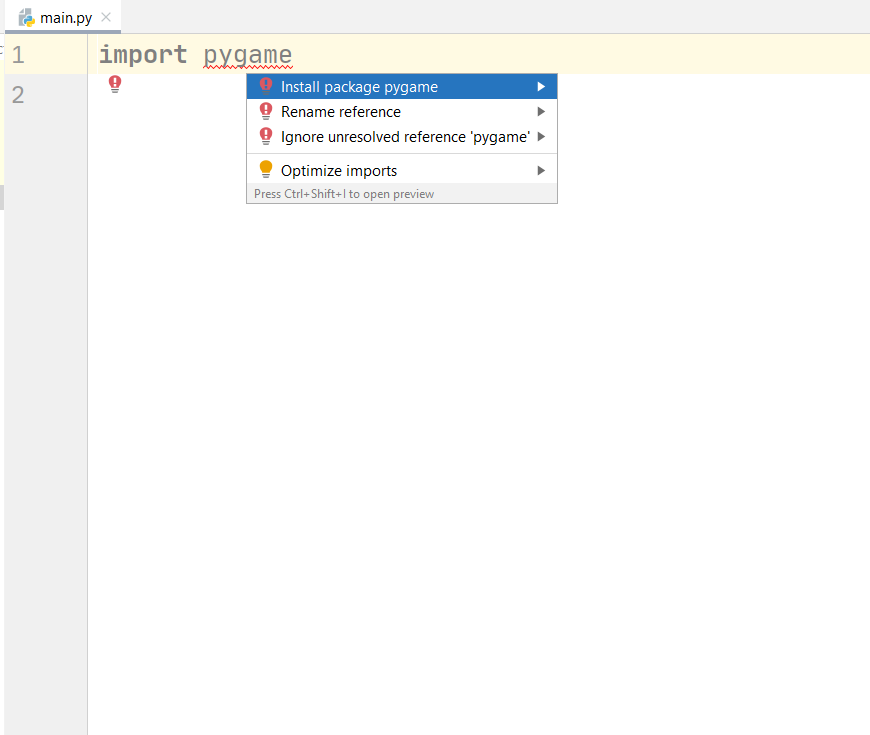
- Type
import pygame at the top of the file. The word pygame
will be underlined in red. (If it is not underlined in red, it is
because pygame is already installed.)
- Place your cursor atop the word
pygame. Type Alt-Enter to bring up
autocorrections. It should bring up an option to install pygame.
The image below shows what this should look like.
Alternative PyGame installation
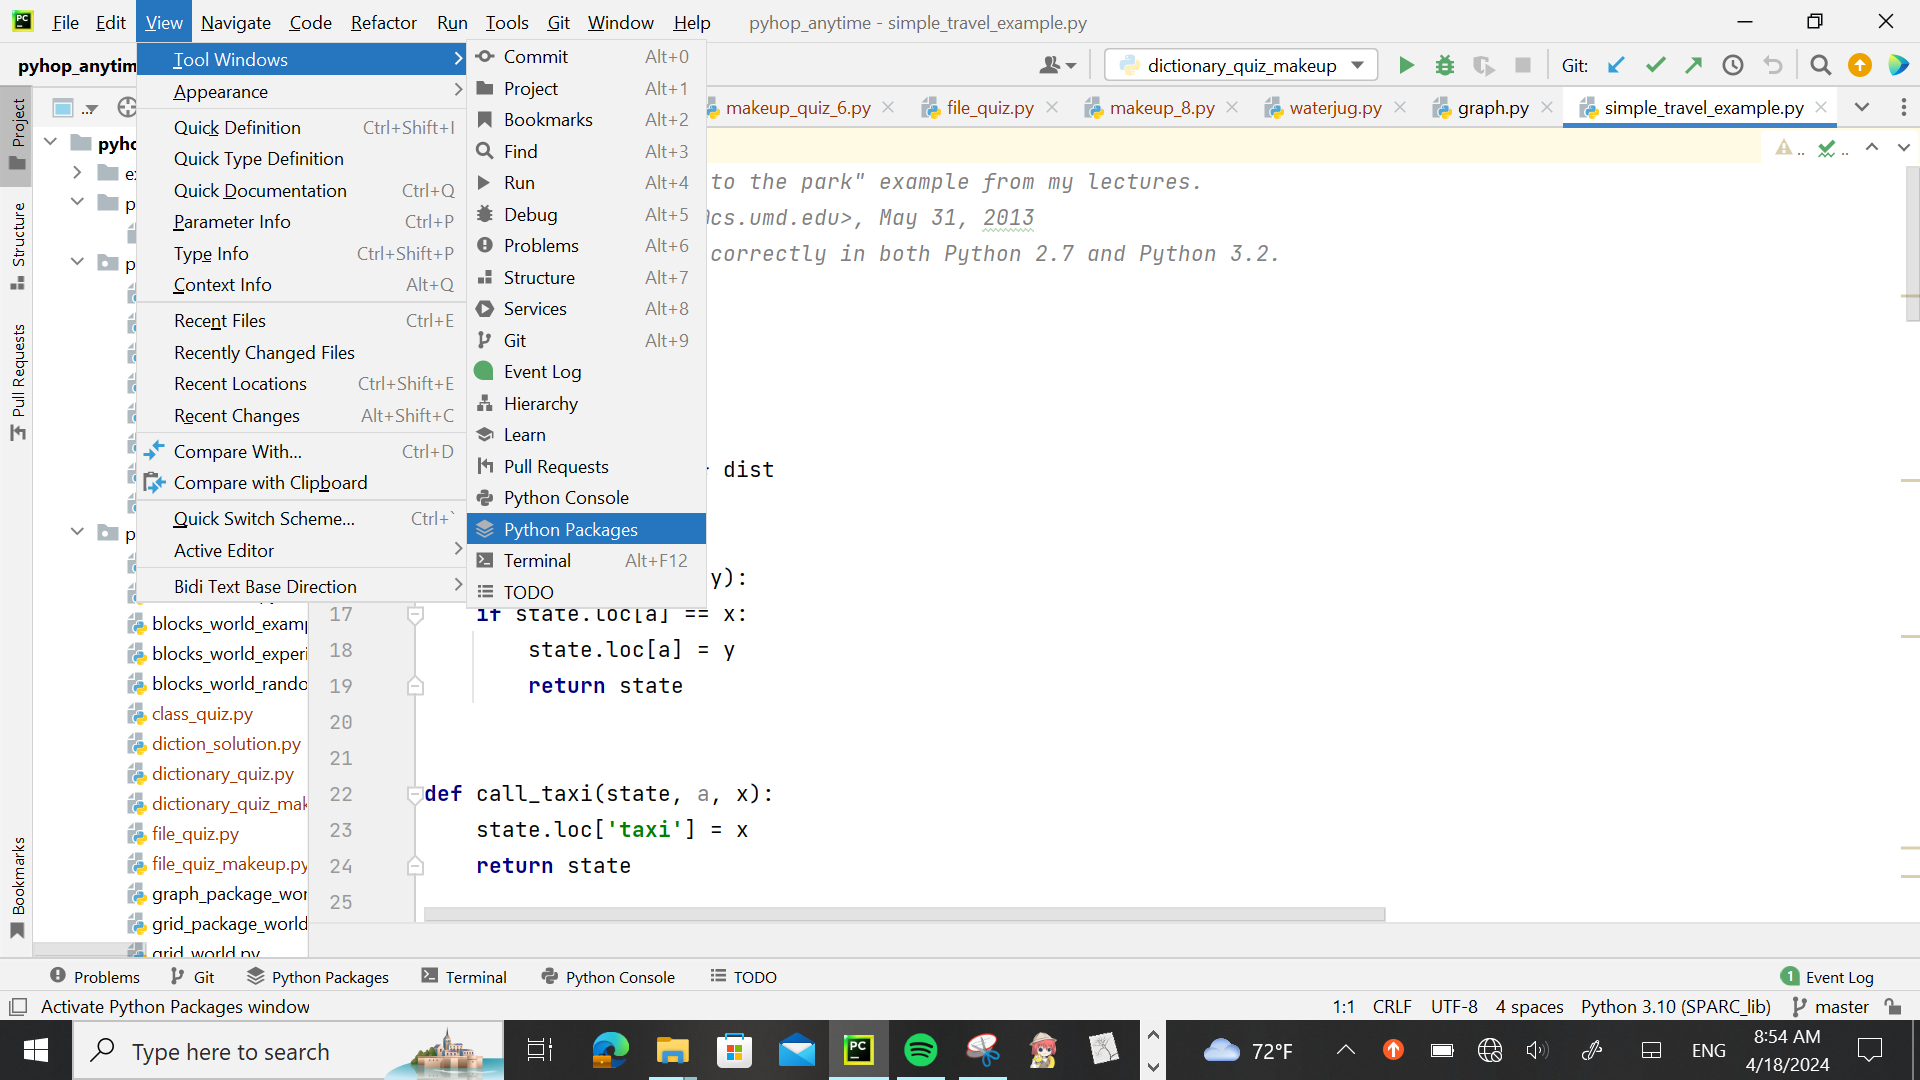
If the above approach does not work, try this:
- Go to the
View menu.
- From the
Tool Windows menu, select Python Packages
- When the search bar opens up, type
pygame.
- An underlined
install text should appear near it. Click on it, and it should install PyGame.
Step 1: Faces
Step 1.1: The Game Loop
Every pygame program has at its heart a while loop that updates the screen and checks to see what
actions the user has taken. Prior to that loop, we write code to set up pygame and open a window in
which our scene will be rendered. The code below will start pygame, set up an empty window, and end the
program when the user closes the window.
Create a file called face1.py and enter the code below:
import pygame
from pygame.locals import *


def main():
    pygame.init()
    surface = pygame.display.set_mode((640, 400))
    running = True
    while running:
        pygame.display.update()
        for event in pygame.event.get():
            if event.type == QUIT:
                running = False
    pygame.quit()

if __name__ == '__main__':
    main()
Step 1.2: Drawing shapes
The program below is a modification of the game loop from Step 1.1. Replace the code from Step 1.1
in face1.py with the code below:
import pygame
from pygame.locals import *


def draw_all(surface):
    surface.fill(pygame.Color(255, 255, 255))
    pygame.draw.circle(surface, pygame.Color(255, 0, 0), (10, 10), 10)
    pygame.draw.rect(surface, pygame.Color(0, 255, 0), (10, 10, 20, 20))
    pygame.draw.line(surface, pygame.Color(0, 0, 0), (10, 10), (20, 20))
    pygame.draw.circle(surface, pygame.Color(0, 0, 0), (30, 30), 10, width=1)
    pygame.draw.rect(surface, pygame.Color(0, 0, 0), (40, 40, 20, 20), width=1)
    pygame.display.update()


def main():
    pygame.init()
    surface = pygame.display.set_mode((640, 480))
    running = True
    while running:
        draw_all(surface)
        for event in pygame.event.get():
            if event.type == QUIT:
                running = False
    pygame.quit()


if __name__ == '__main__':
    main()
In this program, we have instructed pygame to draw several different shapes on the screen.
When we draw on the screen, we first need to
be familiar with the coordinate system. We denote the width as x and
the height as y. Most computer graphics modules, including pygame,
specify that the x, y origin (0,0) is located in the upper-left corner
of the screen, with x increasing to the right and y increasing
downwards.
The first instruction (surface.fill) sets the background color of the window. Each pygame.Color
object is defined by three parameters, ranging in value from 0 to 255: its red, green, and blue levels.
You can also refer to colors by name, using a string. Feel free to consult this
list of available colors when drawing
your pygame objects. Using a color string, the fill instruction would look like this:
The next two instructions (drawing a circle and a rectangle) give us filled-in shapes. Each instruction
specifies the surface on which it is to be drawn and its color. To draw a circle, we also specify its
center and its radius. To draw a rectangle, we specify the (x, y) coordinates of its upper-left corner,
followed by its width and height.
The next three instructions (drawing a line, a circle, and a rectangle) give us lines and outlines. To
draw a line, we specify its surface, its color, the (x, y) coordinates where the line starts, and the
(x, y) coordinates where the line ends. Drawing outlines of circles and rectangles requires giving it
a width parameter, denoting the thickness of the outline.
Also, notice that the first thing to be drawn is covered by the images
that follow. This indicates that the way that images are drawn,
their Z-order, is based on time.
Step 1.3: Drawing Faces
Modify the draw_all function from the previous step to draw a face
on the screen. At a minimum, the face should have eyes, ears, a mouth
and a nose. You can find more shapes on the
Pygame Documentation page.
Here is a version of draw_all that represents the very start of a face.
This is intended as inspiration to get you started; please feel free to
ignore, modify, or replace any and all aspects of this example.
def draw_all(surface):
    surface.fill('white')
    pygame.draw.circle(surface, 'red', (320, 240), 50)
    pygame.draw.circle(surface, 'yellow', (295, 215), 18)
    pygame.draw.circle(surface, 'yellow', (345, 215), 18)
    pygame.draw.line(surface, 'orange', (300, 270), (340, 270))
    pygame.display.update()
Step 2: Classes
Step 2.1: Placing faces with the Mouse
We will represent a Face with a class in Python. The Face will need to remember
the (x,y) coordinates for the center of the face. The draw method of the Face class
abstracts the original face from Step 1.3 so it can be centered around any (x,y) coordinates.
This will let us move the face around the screen. To make this work, the circle representing the
head will be located at self.x, self.y, and the other components will be represented as
offsets from there. Of course, you should use your own face-drawing code in place of the
example code shown below.
Create a file called face2.py and enter the code below:
import pygame
from pygame.locals import *
from dataclasses import dataclass

@dataclass
class Face:
    x: int
    y: int

    def draw(self, surface):
        pygame.draw.circle(surface, 'red', (self.x, self.y), 100)
        pygame.draw.circle(surface, 'yellow', (self.x - 25, self.y - 25), 35)
        pygame.draw.circle(surface, 'yellow', (self.x + 25, self.y - 25), 35)
        pygame.draw.line(surface, 'orange', (self.x - 20, self.y + 30), (self.x + 20, self.y + 30))


def draw_all(surface, shapes):
    surface.fill('black')
    for shape in shapes:
        shape.draw(surface)
    pygame.display.update()


def main():
    pygame.init()
    surface = pygame.display.set_mode((640, 480))
    shapes = []
    running = True
    while running:
        draw_all(surface, shapes)
        for event in pygame.event.get():
            if event.type == QUIT:
                running = False
            elif event.type == MOUSEBUTTONDOWN:
                shapes.append(Face(event.pos[0], event.pos[1]))
    pygame.quit()


if __name__ == '__main__':
    main()
Run the program. Click the mouse at various locations on the window. Every time
the user clicks the mouse, it detects a MOUSEBUTTONDOWN event type. When it
sees that event, it adds a Face object to the shapes list.
Modify the Face class so that it looks just like the face you
designed in Step 1.3. Make sure that all of the parts of the
face appear in the right relationships regardless of screen
location.
Step 2.2: Random Colors
Modify your Face class so that it has a color field in addition to its
x and y fields.
In the draw method of your Face class, replace references to the base color used for
the face with self.color. (In the example of Step 1.3, the base color to be replaced was red.)
Once these changes to the Face class are complete, modify main so
that each Face placed is given a random color. To assign a random
Color, create a list of colors you would like to employ. Then use random.choice() to
select a color from that list every time a new Face object is created.
Step 3: Movement
Step 3.1: Animation
With the faces being drawn by an object, we
can now make these objects move. Add new fields to
your Face, called velocity_x and velocity_y, to capture
the velocity of the Face. For now, initialize them to 1, so they will
be moving at a speed of 1 pixel per update.
Next, add a new method to your Face class
called update. When called, this function will change the
values of self.x and self.y by the velocity, and
thus simulate movement.
def update(self):
    self.x += self.velocity_x
    self.y += self.velocity_y
Finally, inside the draw_all function, add a call to
the update method of each face before the
individual draw method. Your draw_all function should
now look like this:
def draw_all(surface, shapes):
    surface.fill('white')
    for shape in shapes:
        shape.update()
        shape.draw(surface)
    pygame.display.update()
Try it out. Add a few faces. If they fly across the screen
a bit too quickly to see, we will need to add a delay to
our loop. Add the following line to the end of your while loop:
This instruction creates a delay of 10 milliseconds per loop
iteration, yielding about 100 frame updates per second.
Experiment with a few different values for the delay, and
select the value that yields what is in your opinion the
best-looking animation.
Step 3.2: Bouncing
Currently, the faces disappear after a
while, because they move off the bottom of the screen. We would like
to keep them bouncing inside the window. Add in checks to
the update method to reverse the appropriate velocity
component when a face hits a wall, by multiplying the velocity in
that dimension by -1.
The get_width() and get_height() methods of the pygame.Surface
class give the width and height of the window. Think carefully about
how this information will be conveyed to your Face object so that
it can implement bouncing correctly. One approach would be to add
your surface object as a parameter to update().
Step 3.3: Random speeds
Each time you create a Face object, pass to the constructor random
velocities between -5 and 5 for both the x and y
dimension.
You should now have faces moving in all directions and bouncing
off of all the walls of the window.
Step 4: Extensions
Augment your animation with two of the following extensions.
Feel free to make use of Pygame’s documentation
as needed.
Extension 4.1: Face sizes
Add a size component to
your Face, so the setup method can also initialize
the size. Change your draw method of Face to account
for this new size component, and test it out by drawing smaller and
larger faces. Make sure your locations are still chosen so that the
face is always completely visible on the screen!
Make your animations interactive by reacting to input from the
mouse. For example, you could randomly change the color of a Face
when you click it with the mouse,
drag and drop Faces from one place to another, and so forth.
Make your animations interactive by reacting to input from the
keyboard. For example, you could increase or decrease the velocity
of all the Faces when certain keys are pressed, randomly change
their colors, and so forth.
Extension 4.4: Animated faces
Alter your update method of the Face to change the internal pieces of the face
in a cyclic pattern. For example, the face could smile for a few timesteps, then frown,
and then go back to smiling. Or the eyeballs could be moving up and down, left and right.
Extension 4.5 Face collisions
Right now all the Faces pass through each other when they move.
Add a collision detection method that checks each pair of faces to see if they
are intersecting, and if so, makes them bounce off of each other.